Archive for the ‘what’s cooking wednesday’ Category
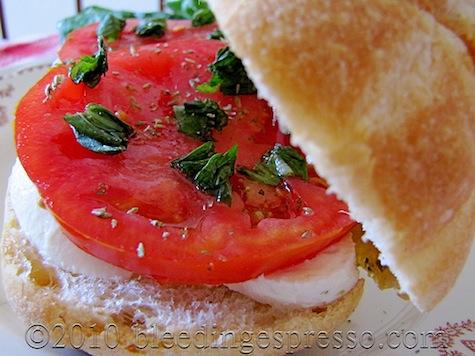
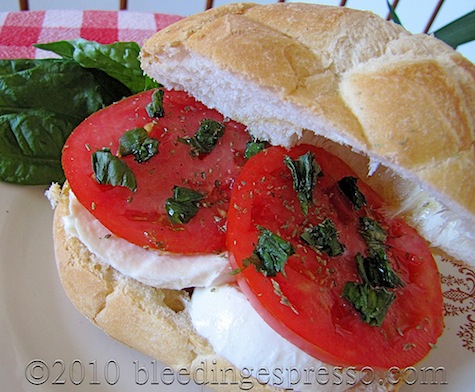
Panino Caprese: Tomato, Mozzarella, and Basil Sandwich
One of our summer staples around here is the Caprese Salad, but sometimes you just want something you can hold in your hand . . . enter the panino caprese.
As with many Italian dishes, the quality of ingredients in this week’s What’s Cooking Wednesday is extremely important, so you should use the best tomatoes (homegrown off the vine), mozzarella (di bufala) and olive oil (extra virgin) you can find. Basil, oregano, and salt round out the ingredients.
I like to put some olive oil on each inside of the bun to start, but you can assemble this any way you like. I do sliced mozzarella first, then sliced tomatoes, then basil, oregano, and salt — with another drizzle of olive oil over the tomatoes to finish it off.
Remember, “panino” in Italy just means a sandwich — it can be on any kind of bread or roll and certainly doesn’t need to be pressed in a grill. That said, you are more than welcome to heat up your panino caprese as that’s tasty as well.
And if you want to whip up some focaccia seasoned with olive oil and oregano (even thyme, yum!) for this sandwich, you won’t be disappointed; indeed, the first time I had one of these, it was at Dean & Deluca in New York City. Love at first bite doesn’t begin to describe it.
Buon appetito!
Panino Con La Mortadella Fritta
Sounds fancy, eh? OK, then let’s stick with that instead of calling this week’s What’s Cooking Wednesday what it really is: a fried bologna sandwich. With senape!
Have you ever had un panino con la mortadella fritta? Even if you don’t normally like bologna, I highly recommend finding the best sliced mortadella you can, tearing it up into smaller pieces, frying it in a pan (no oil, just a hot pan), and then slapping it on a fresh Italian roll. Oh, and add mustard.
My grandmother used to make these whenever we wanted a substantial snack but didn’t know what else to eat. P had never had one of these babies before I came along — and yes, he turned up his nose at first. But then the smell of frying mortadella got to him. He rarely has a “raw” mortadella panino now.
And even though you have to turn the stove on, frying doesn’t take very long so this ends up being a super easy summer treat around here.
Oh, and while we’re talking sandwiches/panini, be sure to check out Sara’s (Ms Adventures in Italy) explanation of the difference between a panino in Italiano and a panino in America at Panini Happy. Great stuff!
Buon appetito!
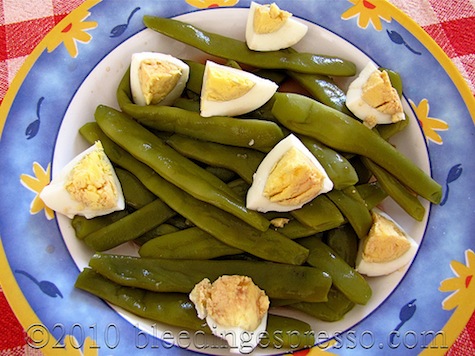
Insalata di Fagiolini: Calabrian Green Bean Salad
We’re eating lots of fagiolini (green beans) now as they’re in season. The other day on the Bleeding Espresso Facebook page, I re-shared the link to my recipe for Green Beans, Pancetta, and Potatoes — one of my absolute favorites — and remember I also posted a similar recipe with tomato sauce and pork.
But you know what I haven’t told you about yet? A delicious, traditional Calabrian recipe for a green bean salad that I never had until I came here. P introduced me to it several years ago, and we eat it often throughout the summer — and I love it more every time I have it.
Note that the traditional Calabrian green bean salad doesn’t include an egg like in the photo below, but if I’m having this for lunch (as opposed to as a side dish), I’ll add an egg for some protein. Notice, incidentally, the yolk color of this egg (from a neighbor) as opposed to ours. Just sayin’.
Insalata di Fagiolini
- 1/2 kilo of green beans
- 3 tablespoons of olive oil
- 2 tablespoons red wine vinegar (or to taste)
- 4 cloves of garlic, cut in half
- Salt to taste
1. Prepare beans by washing and snapping off the stem ends.
2. Parboil beans in salted water for 5-10 minutes until they are no longer crunchy; Calabrians don’t like much crunch in their veggies, but you might, so feel free to adjust for your taste.
3. Strain and let cool.
4. In the meantime, mix together olive oil, garlic, and salt in a small bowl.
5. When the beans are cool, toss them with the dressing (minus the garlic) and let sit for at least 10 minutes so the beans soak up all that goodness.
6. Adjust for seasoning and serve.
Buon appetito!
P.S. Note that you can also freeze parboiled green beans, so if you find yourself with lots of fresh beans and you’re not sure what to do, just clean them, parboil, and freeze and decide later!
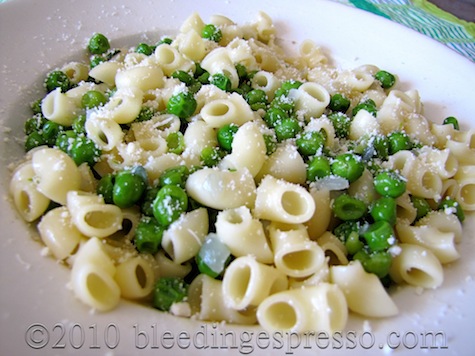
What’s Cooking Wednesday: Pasta with Peas
As you know, we’ve had gorgeous peas from the garden around here lately. One day, we wanted to eat peas but also something a bit more substantial, so P said, “Well can you just put some pasta in with the peas?”
Of course, amore mio, and I came up with this — now one of our favorite meals, especially for lunch in warm weather. It’s so very simple and delicious, and even great cold as a salad IMHO. Feel free to add whatever you like, including pancetta. Yum.
Pasta e Piselli
(Pasta with Peas)
(serves 2)
- 2 tablespoons olive oil
- 1 small red onion, chopped
- 250 grams of shelled (or frozen) peas — canned wouldn’t be great in this
- 1/4 cup water
- 250 grams of short or even soup pasta like lumachine (similar to elbow macaroni in the US)
- Salt
- Freshly grated parmigiano
1. In a medium pan, saute onion in olive oil over medium heat.
2. Add peas and water to pan, and let cook until tender (depends on peas, but can take anywhere from ten minutes and up), adding salt to taste along the way.
3. When the peas are nearing done, put on water for pasta and when it comes to a boil, add salt and prepare pasta.
4. Strain pasta and add to pan with peas and toss together well.
5. Add a drizzle of fresh olive oil and top with lots of freshly grated parmigiano.
Buon appetito!
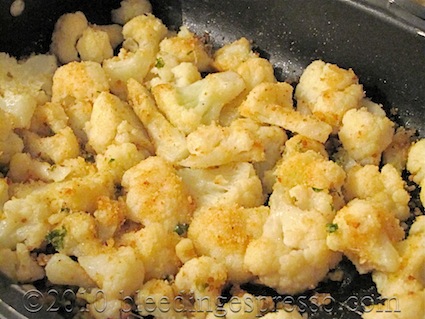
Cavolfiori al Forno – Baked Cauliflower
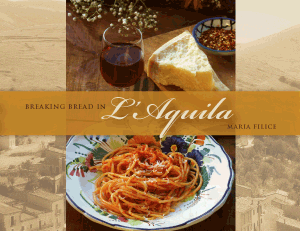 Are you on the edge of your seats wondering who will win a copy of Breaking Bread in L’Aquila by Maria Filice? Well you’ll have to wait just a wee bit longer . . . you can enter the drawing until Thursday, May 20th at 11:59 p.m. CET and then I’ll announce the winner on the Bleeding Espresso Facebook page and also tweet it via @michellefabio (and contact the winner, of course).
P.S. Remember to also join in the contest over at She Who Blogs, where you can read an interview with me *and* enter to a win a signed copy of Mary Amabile Palmer’s Cucina di Calabria!
For now, I’m going to share my adaptation of another of Maria’s wonderful recipes; last week was the recipe for the best crostini ever and this week we’re playing with cauliflower.
I don’t know about you, but I love cauliflower . . . I just get so *bored* with how to make it. And please don’t tell me to mash it up like potatoes. P will barely eat mashed potatoes as it is; I’m not about to risk losing our twice a year mashed potato splurge because of a cauliflower dish gone wrong. Anyone who has cooked for a picky eater knows where I’m coming from on this, right?
Needless to say, I was excited when I saw Maria’s “Cavolfiori al Forno” recipe for baked cauliflower. Fast, easy, delicious, and pretty darn healthy to boot . . . just like we like it around here!
Cavolfiori al Forno – Baked Cauliflower
from Breaking Bread in L’Aquila by Maria Filice
(as adapted by me)
- 1 large cauliflower, cut into florets
- Salt for blanching cauliflower
- 1 clove garlic, cut into two or three pieces*
- 1/4 cup of unseasoned bread crumbs**
- Chopped parsley to taste
- 1/2 to 3/4 cup of freshly grated parmigiano cheese
- 3 tablespoons olive oil
- Salt and black pepper to taste
1. Preheat oven to 375°F (190°C).
2. Fill a large pot about halfway with water and bring to a boil.
3. Add two tablespoons of salt and cauliflower. Boil for 5 minutes and remove cauliflower with a slotted spoon.
4. While the cauliflower is boiling, prepare a bowl with the garlic and olive oil. Add the cauliflower and mix to cover it, then transfer the cauliflower (leaving the garlic behind) to a baking dish.
5. In a small bowl, combine bread crumbs, parsley, and cheese. Spread evenly over cauliflower and season with salt and pepper to taste.
6. Bake uncovered for about 8 minutes; remove and move around cauliflower a bit. Bake for another 8 minutes or so, or until golden. Serve warm.
Buon appetito!
* The original recipe calls for minced garlic, but I found this to be a little too garlicky for my taste, so I left the garlic in bigger pieces for us the next time and really enjoyed it. Feel free to experiment.
** I think you could also go seasoned, or alternately, add a little onion and garlic powder (instead of adding the garlic) ala my veal cutlets. I’m going to try this next time.

