
Archive for the ‘food’ Category
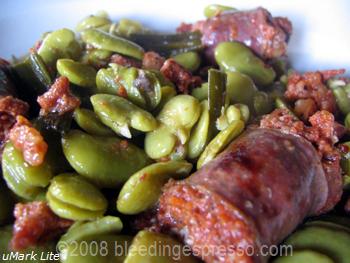
What’s Cooking Wednesday: Calabrian Sausage & Fava Beans
 You had to know it was only a matter of time before fava beans made an appearance on What’s Cooking Wednesday.
Fava beans (also known as broad beans and “fava” in Italian, “fave” is plural) are peasant food at its finest, and if there’s one thing we do well in Calabria, it’s peasant.
I wrote about favas before they start coming into season right around St. Joseph’s Day in March; now we’re at the end of the fava run. Mostly we just eat them raw as a snack (more info on how you get to that point below), but when P’s mom brought a big ole bag of them over, we had an urge to cook them.
And yes, that could also be because “Fabio” comes from faba…Latin for fava! It’s in our DNA around here.
Normally P’s mom would use “carne salata” (a very salty cured meat) with this dish, but we didn’t have any so we used spicy Calabrian sausage. Pancetta or bacon could also easily be substituted.
While researching for the post, I came across this recipe from medieval times–not only is the recipe quite similar to what P’s mom would make, there are words in there more reminiscent of Sicilian/Calabrian than standard Italian. Interesting, huh?
Before we get to the recipe, let’s get something clear before you start–you have to *really* want to eat favas to go through the work involved. Susan of Food Blogga, gives a great demonstration of shelling them here, and now a quick lesson from me.
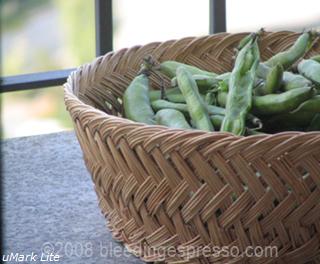
They start looking like this:

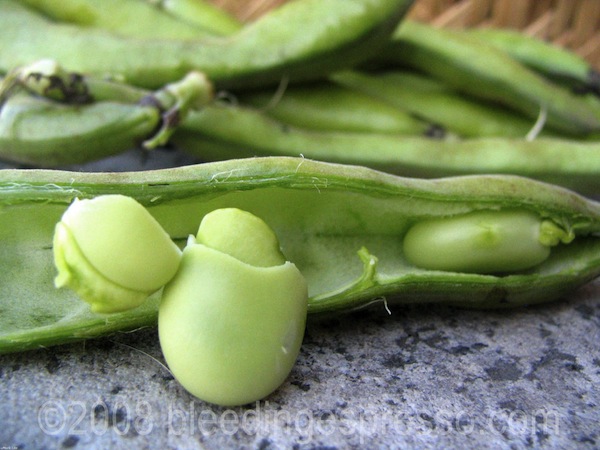
Snap off the top of the pod and pull down so the pod splits at the seam (or otherwise twist and turn the thing until you expose the beans):

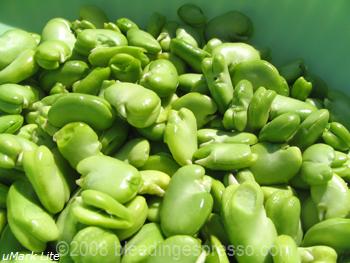
Remove the beans and throw away the pods so that you’re looking at a bunch of beans like this:
You’re not done yet! Now you have to take off the outer casing as well, otherwise you could be in for some nasty digestion issues later.
Susan recommends boiling the beans and then plunging them in ice water, but I just peeled off the little “handle” on top and then squeezed out the beans.

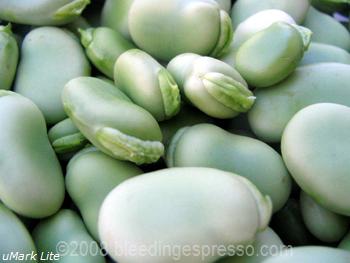
Now your favas are shelled and ready to eat raw or cook.
I told you. You have to want these.
If you’re in the right frame of mind, shelling favas can be an extremely relaxing experience as it was for me. Yes, my thumbs hurt a little bit afterwards, but you know what they say:
No pain, no favas.
They are worth it, I promise, especially since this recipe has only four ingredients. Easy peasy! Or, easy fava-y? And as I told P, it’s fava-loso.
OK I’ll stop now.
Calabrian sausage & fava beans
(Salsiccia calabrese con le fave)
4 tablespoons olive oil
2 links of spicy sausage, cut into chunks
4 garlic sprouts, chopped
Pile of favas
Salt to taste
1. Heat oil in medium pan and add sausage. Let cook for about 10 minutes until the sausage releases some of its fat and flavor into the oil.
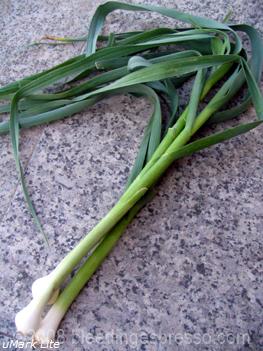
2. Add garlic sprouts and beans and cook until beans are tender but not overcooked, about 15-20 minutes, testing often.
3. Adjust for salt.
4. Serve with fresh, crusty bread, and this is a delicious, hearty meal on its own.
Notes:
1. The green attached to the end of this fresh garlic is what I mean by garlic sprouts. The first time P’s mom called these “code” (COH-deh) or garlic tails, I just had to smile. Isn’t that a great name? Don’t you love Italian?
2. I think this recipe would be great with tomatoes thrown in too, but P wasn’t feeling adventurous, so we did it without. Maybe next fava season.
Buon appetito!
Have you tried fava beans?
What’s your favorite way to enjoy them?
What’s Cooking Wednesday: Gluten-Free Chocolate Coconut Muffins
 I recently came across a great looking recipe for a gluten-free chocolate cake in one of my favorite Italian magazines. I told my mom I was going to try it for a What’s Cooking Wednesday and her immediate reaction was “Why?”
You see, I’m not allergic to gluten; perhaps you could tell from the amount of pasta recipes on here?
As I told my mom, though, I do have friends (and blog readers!) who have Celiac Disease. And let’s be honest: I’m getting plenty of white refined flour in my diet as it is.
Plus today is my sister-in-law’s birthday–a perfect time for some baking.
Happy Birthday N!
So I went to the store and picked up almond flour as listed in the recipe. Next to it on the shelf was coconut flour. Hmmm….
Yes, I came home with two fancy flours. Then I looked closer at the recipe. Six eggs! Goodness that’s a lot. Especially since P had just eaten two of the six I had in the fridge–and the hens wouldn’t be laying any more that day.
So I started looking around the Internet for other gluten-free chocolate cake recipes. I quickly found out that lots of eggs are quite common in gluten-free cake recipes–this one has 10! The cake looks fabulous, but I’m guessing anything with 10 eggs is going to be a little much for just P and me (especially when one of us will only eat sweets when force fed).
Then I found this recipe for Flourless Chocolate Muffins, played around with it, and came up with these:

Now I don’t mean to toot my own corno, but oh these are *so* good.
The coconut adds great texture, and they are just as moist as The Moistest Chocolate Cake in the World (probably because I borrowed the idea of using coffee in the batter).
I will definitely make these again. And again. And you guessed it–yet again.
Gluten-Free Chocolate Coconut Muffins
[makes 6 large or 12 normal size muffins]
 3 eggs
1 cup sugar
1/2 cup almond flour
2/3 cup coconut flour
6 tbl unsweetened cocoa powder
2 tbl vegetable oil
1 tsp baking powder*
2 tsp vanilla*
1/4 (measuring) cup or one small espresso cup of brewed espresso
[*For those in Italy, note that I used one bustina of lievito per dolci in place of baking powder and vanilla.]
1. Preheat oven to 350°F/180°C.
2. Grease 6 large muffin cups, or 12 normal muffin cups.
3. In large mixing bowl, beat together eggs and sugar with electric mixer.
4. Add vegetable oil and mix well.
5. Stir in almond flour, coconut flour, cocoa, vanilla, baking powder, and espresso, and mix gently. I did this with a silicone spatula, something like this.
6. Pour into muffin cups, filling about 3/4 full and bake until a toothpick inserted in the center comes out clean, between 25-35 minutes. (Mine took about 30 minutes.)

With a little dab of marshmallow/fluff, these reminded me so much of my beloved Mallo Cups . . . anyone else love them? Yes, I have a huge sweet tooth, why do you ask?
Buon appetito!
love thursday: lemon love
I’m celebrating lemon love this week.
Although this wonderful citrus fruit grows year round here, lemons still say l’estate to me. I *love* an ice cold glass of homemade lemonade; P prefers lemon slices sprinkled with salt.
As much as I love to enjoy lemons, though, I couldn’t split up this adorable pair:

Even though I know that more are on their way.

What’s your favorite way to enjoy a lemon?
Happy Love Thursday everyone!
What’s Cooking Wednesday: Cannellini Beans & Tomatoes
 This week’s What’s Cooking Wednesday came about as a “What do we already have in the house?” dish.
We had some cannellini beans that P’s mom had prepared for us (they were already soaked and cooked), and although we usually pair them with chicory, we wanted something different.
So I searched the Internet and found this recipe for the traditional Florentine Fagioli all’Uccelletto, which calls for just tomatoes, garlic, olive oil, and sage in addition to the beans. Since I didn’t have any sage, I used basil instead.
And it was delicious.
In fact, this has quickly become a staple for us–so quick and easy, and it sticks to your ribs too, especially when you pair it with fresh bread.
If you want to use dry beans, please see instructions here for soaking and cooking before you add them. I tend to use canned beans because they keep their consistency a little better when mixed with tomatoes in particular.
Cannellini Beans & Tomatoes
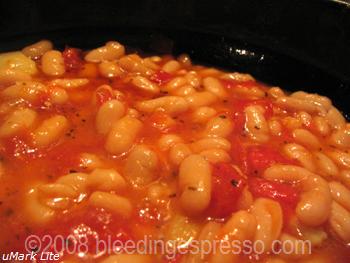
- 4 tablespoons olive oil
- 3 medium-sized ripe tomatoes, cut into chunks
- 3 small cloves of garlic, each cut in half
- 1 tablespoon of dry basil or a few leaves of fresh basil (adjust to taste)
- 2 (400 g) cans cannellini beans
- salt to taste
1. In medium saucepan, heat olive oil over medium heat.
2. Add tomatoes, garlic, basil, and a bit of salt, and let cook for about 15-20 minutes, stirring often with a wooden spoon. You essentially want this to become a chunky sauce. Note that if you’re really against tomato skins in this, parboil the tomatoes first and remove the skins before adding them to the pan.
3. Stir in beans and let cook for another 10 minutes or so. Remember that the beans really only need to be heated through, so be sure the tomatoes are cooked to your liking before adding the beans; otherwise you’ll end up cooking the beans too long, and they’ll get mushy.
4. Adjust for salt and serve hot with crusty bread.
Buon appetito!
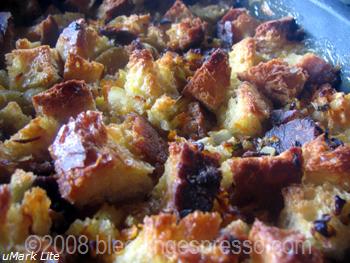
La Buona Cucina Americana: Thanksgiving Filling
![]() Or stuffing or dressing depending on where you’re from.
Or stuffing or dressing depending on where you’re from.
Thanksgiving is absolutely my favorite holiday. It’s all about giving thanks and eating–two of my favorite things. And while I *like* turkey, for me the stars of Thanksgiving are the side dishes. Love them.
I love my mom’s filling the most–so much that it is my first contribution to La Buona Cucina Americana.
 If you don’t know what this is, read Judith in Umbria’s description here.
Essentially we Americans are tired of the trash-talking (pun intended) about our cuisine. Contrary to popular stereotypes (often involving Golden Arches), Americans do shop at markets, slice and dice fresh ingredients, and otherwise make real homemade meals.
Through La Buona Cucina Americana, we are sharing some of our favorite recipes in English and Italian so our Italian amici can try them out too.
So far we’ve had:
- Mary’s American Style Shepherd Pie
- Judith’s Chicken Pot Pie
- Barb’s Scalloped Potatoes
- Sara’s Barbecue Baked Beans
And now, straight from my mom’s cucina:
Thanksgiving Filling
- 1 stick of butter
- 3 carrots, peeled and shredded
- 3 celery stalks, chopped finely
- 1 large onion, chopped finely
- handful of parsley, chopped finely
- 1 loaf stale bread, in chunks (sliced bread is fine)
- 2 cups chicken or vegetable broth
1. Preheat oven to 350°F.
2. Melt butter in large pan and add carrots, celery, onion, and parsley. Sauté for about 10 minutes.
3. In the meantime, make sure the water and broth are heated and grease a medium-sized baking dish with butter.
4. When carrots, celery, and onion are soft, pour water and broth into pan.
5. Add bread cubes, which should look something like this:
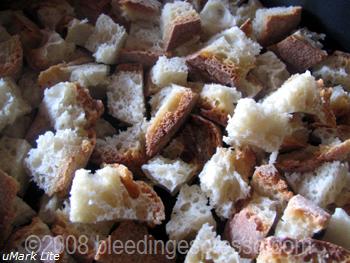
6. Mix with wooden spoon until all bread is moistened, but don’t overmix.
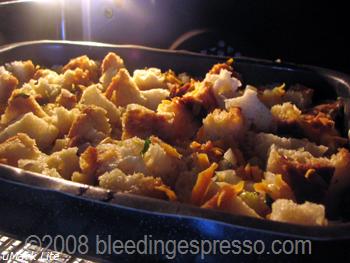
7. Pour mixture into baking dish, and bake in oven for about an hour, a little longer to get an even crunchier top.
8. Let sit for about five minutes after you take it out of the oven before serving.
Notes:
- I bake mine in the oven because I like an uber-crunchy top, but you can also use this as a traditional “stuffing” by stuffing this inside the bird of your choice; just let it cool off before you do so.
- Some of you may be wondering where the sausage is. My mom doesn’t make hers with sausage, so I don’t either. P–like a true Calabrian–asked if I would include it next time, and I will because I’m a good fidanzata.
Ripieno tradizionale per tacchino per il giorno di Ringraziamento
- 110 g di burro
- 3 carote pelate e grattugiate
- 3 gambi di sedano tritati
- 1 cipolla (bianca o gialla) grande tritata
- prezzemolo tritato q.b.
- 600 g di pane secco a cubetti
- 250 mL di brodo (vegetale o pollo)
1. Preriscaldare il forno a 180°C.
2. Fate squagliare il burro in una padella grande e aggiungete le carote, il sedano, la cipolla, ed il prezzemolo. Fate appassire per una decina di minuti.
3. Nel frattempo, assicuratevi che l’acqua ed il brodo sono caldi e imburrare la casseruola.
4. Quando le carote, il sedano, e la cipolla diventeranno morbidi, aggiungete l’acqua ed il brodo.
5. Aggiungete i cubetti di pane.
6. Mescolate con un cucchiaio di legno solo fino ad umidire il pane ma non troppo.
7. Versate il composto nella casseruola. Infornate per circa un’ora, qualche minuti in più per una crosta più croccante.
8. Fate riposarlo per circa 5 minuti prima di servirlo.
Annotazioni:
- Io lo cucino al forno perché mi piace una crosta croccantissima ma potete usare il composto anche come un ripieno tradizionale. Lasciatelo raffredare, quindi usatelo per riempire un tacchino, un pollo, ecc.
- Forse state cercando la salsiccia nella ricetta. Mia mamma non la usa quindi non la uso neach’io. Il mio fidanzato P–come un vero Calabrese–mi ha chiesto di aggiungerla e la prossima volta lo farò perché sono una brava fidanzata.
Buon appetito!
 Michelle Kaminsky is an American attorney-turned-freelance writer who lived in her family's ancestral village in Calabria, Italy for 15 years. This blog is now archived.
Calabria Guidebook
Recipes


